
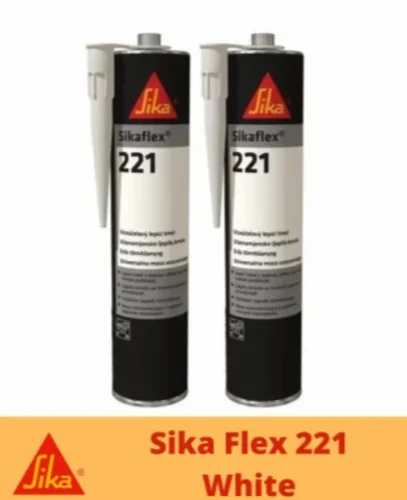
Sika Polyurethane Sealant: Uses, Benefits and Application Guide
Sika polyurethane sealants are used in construction and industrial projects to seal joints, gaps and connections. Their flexible, durable properties make them suitable for applications where a seal needs to accommodate movement caused by temperature changes, vibration or building settlement. The right product depends on the joint, substrate and exposure conditions, so always check the product’s technical data sheet before use.
What Is a Polyurethane Sealant?
A polyurethane sealant is an elastic sealing material that cures after application and forms a flexible bond. It is commonly used on construction joints and around components where a rigid filler could crack or lose contact as materials move.
Sika offers different sealant products for different requirements. Depending on the product, these may be designed for uses such as façade joints, floor joints, concrete construction or general building applications. Product properties and approved uses vary, so one Sika sealant should not be assumed to be interchangeable with another.
Common Applications
Subject to the specific product instructions, polyurethane sealants may be used for:
- Sealing joints in concrete and masonry
- Building façades and external wall joints
- Movement and connection joints in construction
- Sealing around certain doors, windows and building components
- Some floor joints and industrial applications
Not every product is suitable for every substrate or environment. For example, joint width, expected movement, exposure to water or chemicals, and whether the sealant will be exposed to sunlight can all affect product selection.
Key Benefits
- Flexibility: Helps accommodate movement in joints when used within the product’s stated limits.
- Adhesion: Can bond to a range of construction materials, subject to surface preparation and any primer requirements.
- Durability: Formulated for demanding applications, with performance depending on the product and conditions of use.
- Versatility: Different formulations are available for specific construction and industrial needs.
How to Apply Sika Polyurethane Sealant
Correct preparation is essential for a reliable seal. The following steps provide a general overview; the product label and technical data sheet take precedence.
- Choose the correct product: Confirm that the sealant is suitable for the joint, substrate, exposure and expected movement.
- Prepare the joint: Remove dust, loose material, oil, old sealant and other contaminants. The surfaces should meet the product’s requirements for dryness and cleanliness.
- Use backing material where needed: A suitable backing rod can help establish the correct joint depth and prevent the sealant from bonding to the back of the joint. Follow the recommended joint design.
- Apply primer if specified: Some substrates or applications may require a primer. Use only the primer recommended for the selected sealant.
- Apply and finish: Place the sealant evenly into the joint, avoiding air pockets. Tool the surface as directed before a skin forms.
- Allow it to cure: Protect the joint from disturbance and exposure outside the product’s limits while curing. Cure time can vary with temperature, humidity, joint dimensions and product type.
Safety and Storage
Read the product label and safety data sheet before use. Wear the recommended protective equipment, ensure suitable ventilation and avoid contact with skin and eyes. Store the product as directed on its packaging, and do not use material that is past its stated shelf life or has been stored improperly.
Choosing the Right Sika Sealant
Before purchasing, identify the substrate, joint dimensions, expected movement and service conditions. Check whether the sealant is intended for indoor or outdoor use and whether it is compatible with the materials it will contact. For a critical application, consult Sika’s current technical documentation or a qualified construction professional.
Conclusion
Sika polyurethane sealants can provide flexible sealing for a range of construction and industrial joints. Their performance depends on selecting the correct formulation, preparing the surfaces properly and following the specified application and curing instructions. Always refer to the current product data sheet for precise guidance.
Sika Polyurethane Sealant FAQs: Uses, Selection, Outdoor Applications, Joint Preparation, Curing and Painting
- What is Sika polyurethane sealant used for?
- Which Sika polyurethane sealant is suitable for my application?
- Can Sika polyurethane sealant be used outdoors?
- How should I prepare a joint before applying Sika polyurethane sealant?
- How long does Sika polyurethane sealant take to cure?
- Can Sika polyurethane sealant be painted over?
What is Sika polyurethane sealant used for?
Sika polyurethane sealant is used to seal joints, gaps and connections in construction and industrial applications. Depending on the specific product, it may be suitable for concrete, masonry, façades, floors or around building components. Its flexible seal can accommodate some joint movement caused by temperature changes or vibration. Always check the product’s technical data sheet to confirm it is suitable for the substrate and application.
Which Sika polyurethane sealant is suitable for my application?
The right Sika polyurethane sealant depends on the joint type, substrate, expected movement and exposure conditions. Consider whether the application is indoors or outdoors, vertical or horizontal, and whether the joint will face weather, water, traffic or chemicals. Sika offers different formulations for uses such as façades, concrete joints and flooring, so check the product’s current technical data sheet for approved substrates, joint dimensions, movement capability and primer requirements. For a specific or critical application, consult Sika or a qualified construction professional.
Can Sika polyurethane sealant be used outdoors?
Yes, some Sika polyurethane sealants are suitable for outdoor use, including certain façade and construction joints, but suitability varies by product. Check the product’s technical data sheet for its resistance to UV exposure, weather and water, and confirm it is compatible with the joint and substrate. For a durable seal, prepare the surface as directed and apply the sealant within the specified temperature and weather conditions.
How should I prepare a joint before applying Sika polyurethane sealant?
Before applying Sika polyurethane sealant, remove old sealant, dust, loose particles, oil, grease and other contaminants, and make sure the joint edges are sound and prepared as specified in the product’s technical data sheet. The surfaces should be dry unless the product instructions state otherwise. Fit a suitable backing rod to control the sealant depth and prevent three-sided adhesion, where required, and apply primer only if specified for the substrate. Mask the edges for a neat finish, then apply the sealant promptly after preparation.
How long does Sika polyurethane sealant take to cure?
The curing time for Sika polyurethane sealant varies by product, joint size, temperature and humidity. Many products form a surface skin within a few hours and cure progressively—often at around 2–3 mm per 24 hours under standard conditions—but a deep joint may take considerably longer to cure through. Check the specific product’s technical data sheet and avoid disturbing or exposing the sealant to conditions outside its recommendations while it cures.
Can Sika polyurethane sealant be painted over?
Some Sika polyurethane sealants can be painted over once fully cured, but paintability varies by product. Check the product’s technical data sheet and, where possible, test the paint on a small area first. Because the sealant remains flexible, rigid paint may crack as the joint moves; follow the specified curing time and painting instructions for the product.